Decoding the Signal
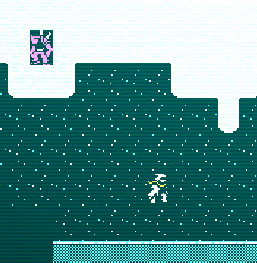
Having proven ourselves, we were accepted into the Barathrumite enclave. Our work has only begun; we have been tasked to decode a strange signal and need the ![]() baetyl at the bottom of Bethesda Susa to do so. Make sure to pack a coat. Live and drink, apprentice.
baetyl at the bottom of Bethesda Susa to do so. Make sure to pack a coat. Live and drink, apprentice.
Recommended
| Level | Abilities | Stats |
|---|---|---|
| 21 | Reliable source of elemental damage, | 13 |
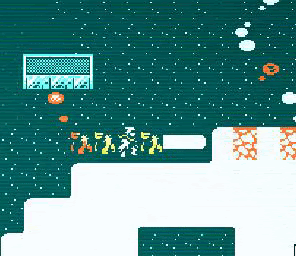
The chosen few that make it past Golgotha are not always so lucky with the sequel, Bethesda Susa. At this point, we should be expecting the Qud punch but somehow, Bethesda Susa manages to surprise. Our first obstacle is actually entering the dungeon.
Initial Threats
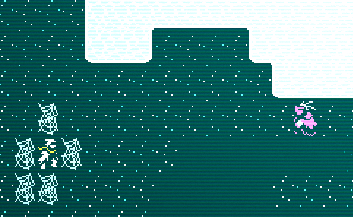
To complete the dungeon, we need to have an answer to 3 enemies; 2 of which can be found often at the entrance. The first enemy is the cragmensch (these being the suite of ![]() cragmensch boulderers,
cragmensch boulderers, ![]() cragmensch brainers, and
cragmensch brainers, and ![]() cragmensch luminary), and the solution is quite simple. If you have a vibro weapon, you're set. At this point, it's not particularly common for you to have such a weapon, so instead any sort of elemental modded weapon is perfect. Having the
cragmensch luminary), and the solution is quite simple. If you have a vibro weapon, you're set. At this point, it's not particularly common for you to have such a weapon, so instead any sort of elemental modded weapon is perfect. Having the ![]() Penetrating Strikes skill from the
Penetrating Strikes skill from the ![]() Single Weapon Fighting tree also makes fighting these guys a breeze since you bypass all that
Single Weapon Fighting tree also makes fighting these guys a breeze since you bypass all that ![]() AV and are guaranteed at least 1 penetration. Alternatively, if you have above 9 PV, you could melee them to death normally.
AV and are guaranteed at least 1 penetration. Alternatively, if you have above 9 PV, you could melee them to death normally. ![]() Axes also work well because of the
Axes also work well because of the ![]() Cleave.
Cleave.
Cragmensch aren't the difficult ones, but not having a reliable way of killing them makes Bethesda Susa agony as it's filled to the brim with them. The second enemy we need a solution for right at the start is the ![]() rimewyk. It always starts with its perfectly accurate and immense range frost breath, which is nearly guaranteed to instantly freeze you. There are some runs where you'll never see one, and there are some where you'll see quite a few; so if you want to take the gamble that you won't encounter one, go for it. If you do encounter a
rimewyk. It always starts with its perfectly accurate and immense range frost breath, which is nearly guaranteed to instantly freeze you. There are some runs where you'll never see one, and there are some where you'll see quite a few; so if you want to take the gamble that you won't encounter one, go for it. If you do encounter a ![]() rimewyk unprepared, they can very easily kill you. We have a few solutions to deal with them though.
rimewyk unprepared, they can very easily kill you. We have a few solutions to deal with them though.
The first and most obvious solution is to simply have high cold resistance. While this is the most obvious, it's also one of the hardest to attain by this point. The ![]() Weathered skill and ape fur items will be our primary form of cold resistance and we can supplement this with wooly modded items. If we really go hard with tinkered items, ape fur items and the
Weathered skill and ape fur items will be our primary form of cold resistance and we can supplement this with wooly modded items. If we really go hard with tinkered items, ape fur items and the ![]() Weathered skill, we can get around 60-80 cold resistance. This would compromise some of our durability in the process, and requires very specific investment. In actuality, you'll probably have closer to 30 cold resistance comfortably, which isn't enough to really save you against a
Weathered skill, we can get around 60-80 cold resistance. This would compromise some of our durability in the process, and requires very specific investment. In actuality, you'll probably have closer to 30 cold resistance comfortably, which isn't enough to really save you against a ![]() rimewyk.
rimewyk.
If you happen to have a highly leveled ![]() Carapace, this is the perfect mutation for this dungeon as it provides tons of armor and cold resistance. The
Carapace, this is the perfect mutation for this dungeon as it provides tons of armor and cold resistance. The ![]() Freezing Ray mutation also lowers your brittle temperature, which is the temperature that you freeze at. Having this, especially with a few ranks, will mean you don't get frozen but you'll still take the cold damage, which is still bad. Finally, we can also use cold cooking effects for cold resistance. The only issue is that the ingredients are expensive and provide a variety of effects, meaning you may not get the cold resistance you're looking for easily. Once inside Bethesda Susa, convalescence is plentiful; but you still retain the issue of lots of effects to cycle through.
Freezing Ray mutation also lowers your brittle temperature, which is the temperature that you freeze at. Having this, especially with a few ranks, will mean you don't get frozen but you'll still take the cold damage, which is still bad. Finally, we can also use cold cooking effects for cold resistance. The only issue is that the ingredients are expensive and provide a variety of effects, meaning you may not get the cold resistance you're looking for easily. Once inside Bethesda Susa, convalescence is plentiful; but you still retain the issue of lots of effects to cycle through.
🗒️ Note: There are many ways of gaining cold resistance, I simply covered the most common and accessible ways here. If you happen to have 70+ cold resistance in other ways, you should be good to go combating the freeze and cold damage of a
rimewyk.
Alternatively to cold resistance, we could instead obtain several ![]() blaze injectors to counter the freezing effect. While
blaze injectors to counter the freezing effect. While ![]() rimewyk are still extremely dangerous, even unfrozen, if we can fight back that gives us a chance. Fighting it poses another challenge, however.
rimewyk are still extremely dangerous, even unfrozen, if we can fight back that gives us a chance. Fighting it poses another challenge, however. ![]() Rimewyk have very good
Rimewyk have very good ![]() DV, which means we need a way of countering that. The
DV, which means we need a way of countering that. The ![]() Horns mutation and abilities that don't roll to hit will be our bread and butter. In particular,
Horns mutation and abilities that don't roll to hit will be our bread and butter. In particular, ![]() Hook and Drag is an excellent skill since you're guaranteed to hit all the attacks you make as you move.
Hook and Drag is an excellent skill since you're guaranteed to hit all the attacks you make as you move.
The last option we have is to become friends with unshelled reptiles. The easiest way to do this is to obtain a single scaled item; either through ![]() Tinkering or just finding it in the world. If you don't want to wear the item through Bethesda Susa, you can instead use it to be neutral with legendary
Tinkering or just finding it in the world. If you don't want to wear the item through Bethesda Susa, you can instead use it to be neutral with legendary ![]() crocs and water ritual them for more permanent reputation. We'll need either 3
crocs and water ritual them for more permanent reputation. We'll need either 3 ![]() crocs or 2 and at least 1 secret. We can also find
crocs or 2 and at least 1 secret. We can also find ![]() salamanders in the desert canyons in case we don't find enough
salamanders in the desert canyons in case we don't find enough ![]() croc lairs. Whichever way you choose to gain the rep, as long as you end up neutral you can ignore the
croc lairs. Whichever way you choose to gain the rep, as long as you end up neutral you can ignore the ![]() rimewyk. In fact, they will be aggressive to the other enemies in the dungeon and are very adept at killing anything around them.
rimewyk. In fact, they will be aggressive to the other enemies in the dungeon and are very adept at killing anything around them.
The Trolls
Once we've entered Bethesda Susa, the first floor gives us a taste of the kinds of creatures we can expect. The second floor is where we start to face off against the 3 guardian trolls of Bethesda Susa. Let's dive into how we get past each one.
Jotun, Who Parts Limbs
And part limbs he does. ![]() Jotun doesn't have special gimmicks like the other trolls, he is simply a warrior specializing in
Jotun doesn't have special gimmicks like the other trolls, he is simply a warrior specializing in ![]() Axes. While he does dual wield two-handed
Axes. While he does dual wield two-handed ![]() Axes, he is also capable of mid-range combat with
Axes, he is also capable of mid-range combat with ![]() throwing axes, but these don't benefit from any
throwing axes, but these don't benefit from any ![]() Axe skills. If you plan on killing
Axe skills. If you plan on killing ![]() Jotun, your strategies will differ greatly based on your build at this point in the game, so I won't cover all the possibilities. Instead, I'll offer solutions to counter
Jotun, your strategies will differ greatly based on your build at this point in the game, so I won't cover all the possibilities. Instead, I'll offer solutions to counter ![]() Jotun's abilities.
Jotun's abilities.
If you have the ![]() AV to stand up to the PV of the
AV to stand up to the PV of the ![]() throwing axes (13), then you can sit back on the edge of
throwing axes (13), then you can sit back on the edge of ![]() Jotun's throwing range and spew out sower seeds at him. If he can throw his axes, he tends to do so instead of trying to continue approaching. By sitting as far back as possible, he will have poor accuracy while you don't care about accuracy since you're throwing explosives. If you have low
Jotun's throwing range and spew out sower seeds at him. If he can throw his axes, he tends to do so instead of trying to continue approaching. By sitting as far back as possible, he will have poor accuracy while you don't care about accuracy since you're throwing explosives. If you have low ![]() AV though, don't count on it helping you against the
AV though, don't count on it helping you against the ![]() throwing axes. If the
throwing axes. If the ![]() throwing axe lands in your square, it will hit you, and if your
throwing axe lands in your square, it will hit you, and if your ![]() AV is low it can easily hit in the 70s for damage. If you find yourself in one of those situations where you need to approach and fight in melee, you'll want to avoid both the
AV is low it can easily hit in the 70s for damage. If you find yourself in one of those situations where you need to approach and fight in melee, you'll want to avoid both the ![]() throwing axes and
throwing axes and ![]() Jotun's
Jotun's ![]() Charge. Fighting him in the convalescence will only make him more dangerous from its healing effects. Instead, draw his attention and then hide behind a pillar.
Charge. Fighting him in the convalescence will only make him more dangerous from its healing effects. Instead, draw his attention and then hide behind a pillar.
To fight ![]() Jotun in melee combat, you should definitely have as high
Jotun in melee combat, you should definitely have as high ![]() AV as you can find. With the immense amount of damage he does, you need to be sure you can take a few hits when he inevitably connects. If you can disarm him, while it doesn't completely solve his threat he is much less dangerous without his most powerful
AV as you can find. With the immense amount of damage he does, you need to be sure you can take a few hits when he inevitably connects. If you can disarm him, while it doesn't completely solve his threat he is much less dangerous without his most powerful ![]() Axe. If you get hooked via
Axe. If you get hooked via ![]() Hook and Drag, using
Hook and Drag, using ![]() Juke (swapping with
Juke (swapping with ![]() Jotun) will break the hook and allow you to get away. Additionally, grenades are always very helpful here. Freeze grenades, even mk II, can keep
Jotun) will break the hook and allow you to get away. Additionally, grenades are always very helpful here. Freeze grenades, even mk II, can keep ![]() Jotun stuck in place for quite a while. Just make sure you don't freeze yourself or have some
Jotun stuck in place for quite a while. Just make sure you don't freeze yourself or have some ![]() blaze injectors to keep on the offense while
blaze injectors to keep on the offense while ![]() Jotun takes an ice bath.
Jotun takes an ice bath.
You can alternatively use some sort of forcefield to keep him at bay while you again either throw grenades at him or shoot at him, ideally with the ![]() carbine we received from the previous quest. You are guaranteed to find a
carbine we received from the previous quest. You are guaranteed to find a ![]() force bracelet at Bey Lah on
force bracelet at Bey Lah on ![]() Hindriarch Keh for purchase. Finally, if you managed to get the
Hindriarch Keh for purchase. Finally, if you managed to get the ![]() hologram bracelet or found one by other means, you can use it to distract
hologram bracelet or found one by other means, you can use it to distract ![]() Jotun again long enough for you to kill him. It works better the closer he is to the hologram and the further you are from the troll. Once
Jotun again long enough for you to kill him. It works better the closer he is to the hologram and the further you are from the troll. Once ![]() Jotun is dead, you can take the key and advance to the next guardian.
Jotun is dead, you can take the key and advance to the next guardian.
Fjorn-Kosef, Who Knits the Icy Lattice
![]() Fjorn-Kosef is easily the weakest of the trio; a little cold resistance and he is of no concern. He will start off with his unique mutation where he spawns frozen webbing around you from a distance. Simply walk out of it and continue towards
Fjorn-Kosef is easily the weakest of the trio; a little cold resistance and he is of no concern. He will start off with his unique mutation where he spawns frozen webbing around you from a distance. Simply walk out of it and continue towards ![]() Fjorn-Kosef. In melee, he attacks with his
Fjorn-Kosef. In melee, he attacks with his ![]() ice-encrusted fists which are nowhere near as dangerous as
ice-encrusted fists which are nowhere near as dangerous as ![]() Jotun's
Jotun's ![]() Axes. He can stun with them as they are
Axes. He can stun with them as they are ![]() Cudgels, so the
Cudgels, so the ![]() Shake It Off skill is quite handy to have.
Shake It Off skill is quite handy to have.
All the strategies about taking ![]() Jotun on at a range apply to
Jotun on at a range apply to ![]() Fjorn-Kosef as well and, unlike
Fjorn-Kosef as well and, unlike ![]() Jotun,
Jotun, ![]() Fjorn-Kosef has no countermeasures at range aside from the frozen webbing. As long as you don't stand in it, this is an easy fight.
Fjorn-Kosef has no countermeasures at range aside from the frozen webbing. As long as you don't stand in it, this is an easy fight.
Haggabah, Who Plies the Umbral Path
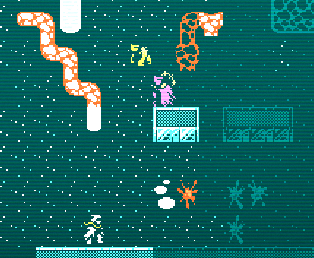
![]() Haggabah is an interesting fellow. He is indeed invisible, but as you can plainly tell by the screenshot, we have ways of revealing him. If you are a mutant, we can use one of a variety of mutations in order to reveal him:
Haggabah is an interesting fellow. He is indeed invisible, but as you can plainly tell by the screenshot, we have ways of revealing him. If you are a mutant, we can use one of a variety of mutations in order to reveal him: ![]() Clairvoyance,
Clairvoyance, ![]() Night Vision,
Night Vision, ![]() Heightened Hearing and
Heightened Hearing and ![]() Sense Psychic.
Sense Psychic. ![]() Clairvoyance lasts only as long as its reveal duration, so it's one of the more temperamental solutions.
Clairvoyance lasts only as long as its reveal duration, so it's one of the more temperamental solutions. ![]() Heightened Hearing and
Heightened Hearing and ![]() Sense Psychic are perhaps the most effective, as they reveal the location of
Sense Psychic are perhaps the most effective, as they reveal the location of ![]() Haggabah as long as he is within range.
Haggabah as long as he is within range.
If you have none of these mutations or are a true kin, we can use any form of night vision (like from ![]() night-vision goggles or the
night-vision goggles or the ![]() night vision cybernetic) to reveal
night vision cybernetic) to reveal ![]() Haggabah except the form granted by
Haggabah except the form granted by ![]() skulk injectors. The caveat to this is that
skulk injectors. The caveat to this is that ![]() Haggabah cannot be in a light source, which the convalescence generates. Therefore, you'll want to draw him to the edges of the arena in order to see him. Additionally, if you have the
Haggabah cannot be in a light source, which the convalescence generates. Therefore, you'll want to draw him to the edges of the arena in order to see him. Additionally, if you have the ![]() penetrating radar cybernetic or
penetrating radar cybernetic or ![]() night-sight interpolators those also will work here and don't rely on
night-sight interpolators those also will work here and don't rely on ![]() Haggabah to be in darkness.
Haggabah to be in darkness.
If you have none of these options, well then you're in quite the pickle aren't you? We can instead lure ![]() Haggabah into the convalescence as a trap to reveal his location. Let's observe the following example:
Haggabah into the convalescence as a trap to reveal his location. Let's observe the following example:
![]() Haggabah's AI likes to make things hard for us by moving randomly every once in a while. But we can use clues in the terrain to aid our guesses to where he is. For some context, just before this gif started, the bloody
Haggabah's AI likes to make things hard for us by moving randomly every once in a while. But we can use clues in the terrain to aid our guesses to where he is. For some context, just before this gif started, the bloody ![]() troll foal had just spawned, which tells me it budded off of
troll foal had just spawned, which tells me it budded off of ![]() Haggabah. This tells me that
Haggabah. This tells me that ![]() Haggabah is likely in the tile with the convalescence puddle next to the bloody pool. Later, a pool of convalescence becomes bloody and then another puddle appears where no enemy is. This further tells me where
Haggabah is likely in the tile with the convalescence puddle next to the bloody pool. Later, a pool of convalescence becomes bloody and then another puddle appears where no enemy is. This further tells me where ![]() Haggabah is. I move closer at the end of the gif to see if I attack him or get attacked, but neither happens. This is thanks to the random movement AI. I have, however, determined he is either right next to me or very close, which is all I need.
Haggabah is. I move closer at the end of the gif to see if I attack him or get attacked, but neither happens. This is thanks to the random movement AI. I have, however, determined he is either right next to me or very close, which is all I need.
In this sequence, I am holding ctrl as I press a movement direction. This ensures that I don't move, and I only attack if there is something in the direction I attack. I use this to first check the empty tiles around me, and since I don't attack this tells me ![]() Haggabah is not next to me. I then kill the
Haggabah is not next to me. I then kill the ![]() troll foal on the right as I think it's between me and
troll foal on the right as I think it's between me and ![]() Haggabah. I check the empty tiles again, since if I attack where the
Haggabah. I check the empty tiles again, since if I attack where the ![]() troll foal was, I'll attack the corpse. When I don't attack anything again, I then attack the tile with the
troll foal was, I'll attack the corpse. When I don't attack anything again, I then attack the tile with the ![]() troll corpse. Even though no animation plays, I can hear the sounds of my attack (this doesn't help you in gif form), but I also see that my attack animation does not play and that the
troll corpse. Even though no animation plays, I can hear the sounds of my attack (this doesn't help you in gif form), but I also see that my attack animation does not play and that the ![]() troll foals are acting. This means that I did attack, and since no animation played it means I attacked
troll foals are acting. This means that I did attack, and since no animation played it means I attacked ![]() Haggabah and not the corpse. You'll notice that it seems like I do nothing while the
Haggabah and not the corpse. You'll notice that it seems like I do nothing while the ![]() troll foal just scratches at my back, but I'm actually killing
troll foal just scratches at my back, but I'm actually killing ![]() Haggabah here. You can see a popup at the very end, which is the corner of the popup that appears when you kill a legendary creature, letting me know I successfully killed
Haggabah here. You can see a popup at the very end, which is the corner of the popup that appears when you kill a legendary creature, letting me know I successfully killed ![]() Haggabah.
Haggabah.
![]() Haggabah's weapons deal umbral damage on hit, which is primarily where his damage comes from. This damage type cannot be reduced in any way. If you are planning to fight him in melee, you will want to have a decent
Haggabah's weapons deal umbral damage on hit, which is primarily where his damage comes from. This damage type cannot be reduced in any way. If you are planning to fight him in melee, you will want to have a decent ![]() DV score or just DPS race him. The ranged options discussed with
DV score or just DPS race him. The ranged options discussed with ![]() Jotun work here as well, just with the added complication that
Jotun work here as well, just with the added complication that ![]() Haggabah is a bit tricky to see.
Haggabah is a bit tricky to see. ![]() Haggabah truly has no ranged attacks, so if you can keep your distance from him this fight will go better.
Haggabah truly has no ranged attacks, so if you can keep your distance from him this fight will go better.
While there are nearly infinite ways to actually go about the killing of the trolls, a particular weapon stands out above the rest as something obtainable by this point and having extreme killing efficiency against the trolls (and virtually everything else). This weapon is the ![]() flamethrower; if you are able to find one (or craft one with
flamethrower; if you are able to find one (or craft one with ![]() Tinkering) by this point, it is perhaps the most powerful weapon you can reasonably use for this dungeon. I could spend pages dissecting every weapon and how they fare in Bethesda Susa, but I will simply leave it here as I find the
Tinkering) by this point, it is perhaps the most powerful weapon you can reasonably use for this dungeon. I could spend pages dissecting every weapon and how they fare in Bethesda Susa, but I will simply leave it here as I find the ![]() flamethrower to be in a unique spot where it is technically accessible by now and performs extraordinarily.
flamethrower to be in a unique spot where it is technically accessible by now and performs extraordinarily.
The Cheese
You didn't honestly think I was going to leave you to just fight it out now did you? We certainly have better solutions. The first we'll cover is certainly the simplest; we just dig around them. The trolls typically spawn far enough away that they will not aggro onto you as soon as you go down the stairs. We can use this to our advantage by simply digging into the walls and into the small hut on the opposite side where the stairs are. For an example of what I'm talking about, look no further:

To the far left, you can see where I came into the room and started digging. Now look carefully at the walls to the north of my character. You can see that the wall to my direct northwest extends further upwards, which tells me that the walls to the right of it will lead into the room behind the door. By breaking down one of these walls, we can move down to the next room and repeat. Just make sure you bring a capable digging method if you decide to do this.
Digging is not our only solution. We can alternatively use ![]() Phasing or our phase silk to pass through the wall and down the stairs. Care should be taken of choosing this option, since the trolls can and will open the door to get to you (the foals will be unable to open the door though). Do your best to combine
Phasing or our phase silk to pass through the wall and down the stairs. Care should be taken of choosing this option, since the trolls can and will open the door to get to you (the foals will be unable to open the door though). Do your best to combine ![]() Sprint to drop aggro as you pass through the wall, that way you can reset your cooldowns before advancing and won't have the troll pop in on you.
Sprint to drop aggro as you pass through the wall, that way you can reset your cooldowns before advancing and won't have the troll pop in on you.
If you are a fan of making friends, the trolls are no exception. They exist in the criminally underused Troll faction, and can be made neutral like any other faction. Unfortunately, the 3 guardian trolls are the only legendary trolls in the game, so if you want to get this before going to Bethesda Susa, you'll have some difficulty and will have to rely on RNG through legendary relations and Schrodinger pages. If you've learned anything so far, I do not like leaving things to chance; we have a better solution if this is the path you want to take.
Instead, we can take with us a few ![]() love injectors. If you equip one in your hand and stab the troll with it, you will gain a new troll friend for a considerable amount of time. We can then water ritual the troll and have them donate their key; so we don't even need to break down the wall! Stabbing in melee is the obvious way of applying injectors, but you can also throw them at your target. This makes injection safe and reliable from a distance, but if you have poor Strength you may be inaccurate the further you are from the target. The
love injectors. If you equip one in your hand and stab the troll with it, you will gain a new troll friend for a considerable amount of time. We can then water ritual the troll and have them donate their key; so we don't even need to break down the wall! Stabbing in melee is the obvious way of applying injectors, but you can also throw them at your target. This makes injection safe and reliable from a distance, but if you have poor Strength you may be inaccurate the further you are from the target. The ![]() Deft Throwing skill and
Deft Throwing skill and ![]() parabolic muscular subroutine cybernetic makes things more reliable.
parabolic muscular subroutine cybernetic makes things more reliable.
![]() Jotun is the scariest to do this against since he can kill you the fastest, but unless you are foolishly under equipped you should be more than capable of successfully injecting him. By water ritualing the first 2 trolls, you won't quite have enough reputation to leave
Jotun is the scariest to do this against since he can kill you the fastest, but unless you are foolishly under equipped you should be more than capable of successfully injecting him. By water ritualing the first 2 trolls, you won't quite have enough reputation to leave ![]() Haggabah neutral to you. However, you can share a single secret which will push you over the edge to neutrality.
Haggabah neutral to you. However, you can share a single secret which will push you over the edge to neutrality.
Luckily, you can (sort of) reliably find out a secret that is shareable with the trolls: the location of ![]() Stopsvalinn. Not only is
Stopsvalinn. Not only is ![]() Stopsvalinn a powerful
Stopsvalinn a powerful ![]() Shield, but it's also one of the few legendary items that trolls will accept the secret for. Even better for us is that 2 different factions will give us the location of this artifact, and both of them are very easy to gain reputation with: the Barathrumites and the Mechanimists. This means that as long as you can water ritual the first two trolls,
Shield, but it's also one of the few legendary items that trolls will accept the secret for. Even better for us is that 2 different factions will give us the location of this artifact, and both of them are very easy to gain reputation with: the Barathrumites and the Mechanimists. This means that as long as you can water ritual the first two trolls, ![]() Haggabah will leave you alone if you know the location of
Haggabah will leave you alone if you know the location of ![]() Stopsvalinn. This is particularly handy since we can't see
Stopsvalinn. This is particularly handy since we can't see ![]() Haggabah, and if we can't see him, we can't trade with him, even if we figure out where he is. The final thing to mention about this strategy is you can shoot injectors with a
Haggabah, and if we can't see him, we can't trade with him, even if we figure out where he is. The final thing to mention about this strategy is you can shoot injectors with a ![]() dart gun purchasable from
dart gun purchasable from ![]() Neek in Grit Gate (less reliable than throwing to be honest) and that
Neek in Grit Gate (less reliable than throwing to be honest) and that ![]() love injectors can rarely fail if you are a lower level than your target.
love injectors can rarely fail if you are a lower level than your target.
🗒️ Note: A common enough strategy is to use
Clairvoyance and
Teleportation together to blink into the small room. I don't recommend this strategy since it not only requires two specific mutations but also requires considerable investment in the
An additional strategy you can use if you happen to have it is to simply deploy a ![]() spiral borer from the surface zone next to the Bethesda Susa entrance. Move down to strata 14 and dig over into the compound to just skip the whole dungeon. Just make sure you have that Mechanimist reputation first.
spiral borer from the surface zone next to the Bethesda Susa entrance. Move down to strata 14 and dig over into the compound to just skip the whole dungeon. Just make sure you have that Mechanimist reputation first.
The Ruined Ward
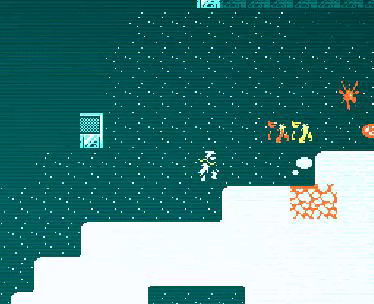
Now that we're properly in the compound, we will have to address the final noteworthy enemy here: the ![]() gyrohumor. Unlike their single headed variation,
gyrohumor. Unlike their single headed variation, ![]() gyrohumors will cycle between elements they embody. Since they do elemental damage (and a considerable amount of it), our best way of fighting them is to not be near them. If we have high
gyrohumors will cycle between elements they embody. Since they do elemental damage (and a considerable amount of it), our best way of fighting them is to not be near them. If we have high ![]() DV, we can dodge most of their attacks as they have terrible Agility, but be prepared to retreat early since they can stun you and they do a considerable amount of damage if you do not have resistances.
DV, we can dodge most of their attacks as they have terrible Agility, but be prepared to retreat early since they can stun you and they do a considerable amount of damage if you do not have resistances.
Upon death, they explode and deal damage in line with their form. The heat form will heat you so much you will be heavily ignited, the cold form will cool you far past the point of freezing, the acid form will spray acid on you and the electric form will release a discharge on you. That looks to me like 4 good reasons not to kill them in melee, so be sure to bring a reliable ranged weapon to deal with them (like the Sparbine, hmm?). Forcefields do particularly well at enforcing our desired social distancing, resulting in yet another excellent reason to retrieve the ![]() force bracelet or
force bracelet or ![]() Stopsvalinn before arriving at Bethesda Susa.
Stopsvalinn before arriving at Bethesda Susa.
If you're concerned about the creatures in here, you actually only need to be capable of surviving 4 floors instead of the 8 creature-filled floors of Bethesda Susa. On each floor, there is a platform that will take you to the 5th and 11th floors. By pressing the switch, it will bring the platform to you so just stand on the platform and press it again to go down to the 11th floor.
The Compound
On the 14th floor, we come across a ![]() phase spider and a sealed door. We can either:
phase spider and a sealed door. We can either:
 Harvest the phase silk, cook with it and gain
  Phasing and phase through the wall.
- Step in the phase web to begin Phasing, and walk through the wall before it wears off.
- Teleport past with a mutation or yondercane.
- Mine one of the walls.
- Oonga-boonga brain regular weapon attack a wall.
Whatever you decide to do, the final floor before the Mechanimist compound is guaranteed to have a ![]() juicing cannibal with a
juicing cannibal with a ![]() missile launcher. It can and likely will destroy some of the cryochambers; which each contain an enemy you probably won't be capable of defeating. The
missile launcher. It can and likely will destroy some of the cryochambers; which each contain an enemy you probably won't be capable of defeating. The ![]() rhinox and
rhinox and ![]() Saad Amus are the two that will follow you around, while the plant will just be annoying on this floor only. If either of these two are freed, you can either continue down to the compound before it unfreezes or wait for it to unfreeze and face it. The
Saad Amus are the two that will follow you around, while the plant will just be annoying on this floor only. If either of these two are freed, you can either continue down to the compound before it unfreezes or wait for it to unfreeze and face it. The ![]() rhinox is definitely not worth fighting, but
rhinox is definitely not worth fighting, but ![]() Saad Amus will drop his very powerful
Saad Amus will drop his very powerful ![]() ceremonial vibrokhopesh and
ceremonial vibrokhopesh and ![]() Flume-Flier of the Sky-Bear on death. If you are interested in fighting
Flume-Flier of the Sky-Bear on death. If you are interested in fighting ![]() Saad Amus, the next section I will cover some strategies for doing so. Otherwise, drop down to the Mechanimist compound using the elevator.
Saad Amus, the next section I will cover some strategies for doing so. Otherwise, drop down to the Mechanimist compound using the elevator.
The compound is considered a holy site to the Mechanimist faction, so they will attack you unless you are favored with them (250+ reputation). It's highly recommended for this quest that you do indeed get at least 250 reputation, as fighting all of the Mechanimists here is a non-trivial task. There are no general tips I can give you if you choose to kill the defenders of the compound; but you will need powerful stats, good equipment, and general good decision-making and experience. You won't be able to escape without pressing the button next to the ![]() baetyl near the center.
baetyl near the center.
If you have the reputation, this floor is completely peaceful; just collect whatever loot you can carry and insert the disk in the ![]() baetyl; quest complete. If you don't, good luck on your fight.
baetyl; quest complete. If you don't, good luck on your fight.
Saad Amus
Ah so greed got the better of you and you want that juicy loot, do you? Before I begin explaining any strategies, the biggest recommendation is to simply come back when you are stronger. If you have an easy way of killing ![]() Saad Amus then great, fight on. Otherwise, it's just not worth it as he is a very deadly fighter.
Saad Amus then great, fight on. Otherwise, it's just not worth it as he is a very deadly fighter.
First, lets cover his stats: 160 quickness and 75 in every resistance, 350 ![]() HP, 12
HP, 12 ![]() DV and 6
DV and 6 ![]() AV. His attributes are actually fairly low, but it doesn't matter because of his skills and his weapon: the
AV. His attributes are actually fairly low, but it doesn't matter because of his skills and his weapon: the ![]() ceremonial vibrokhopesh.
ceremonial vibrokhopesh. ![]() Saad Amus has every
Saad Amus has every ![]() Long Blade skill and every
Long Blade skill and every ![]() Single Weapon Fighting skill, which means he will always make 2 attacks per attack action (
Single Weapon Fighting skill, which means he will always make 2 attacks per attack action (![]() Weapon Mastery) and receive 1 extra penetration than normal (
Weapon Mastery) and receive 1 extra penetration than normal (![]() Penetrating Strikes). Since the
Penetrating Strikes). Since the ![]() ceremonial vibrokhopesh is a vibro weapon, it is extraordinarily likely for him to get 1 penetration per hit; it is expected for him to get 1.561 penetrations per hit precisely.
ceremonial vibrokhopesh is a vibro weapon, it is extraordinarily likely for him to get 1 penetration per hit; it is expected for him to get 1.561 penetrations per hit precisely.
This means that ![]() Saad Amus is expected to get 2.561 penetrations per hit and make 2 attack per round, meaning you're expected to take 5d10 + 10 damage every single time
Saad Amus is expected to get 2.561 penetrations per hit and make 2 attack per round, meaning you're expected to take 5d10 + 10 damage every single time ![]() Saad Amus gets a round, which averages to 40 damage per round. Compound this with his high quickness and for every move you make he can easily do around 80 points of damage. High
Saad Amus gets a round, which averages to 40 damage per round. Compound this with his high quickness and for every move you make he can easily do around 80 points of damage. High ![]() DV is not very helpful here, as
DV is not very helpful here, as ![]() Saad Amus will open with
Saad Amus will open with ![]() En Garde! and
En Garde! and ![]() Swipe in
Swipe in ![]() Dueling Stance, which will quicky disarm you of all your weapons and is guaranteed to hit and penetrate at least once (but since it's a vibro weapon, the latter effect rarely is of consequence).
Dueling Stance, which will quicky disarm you of all your weapons and is guaranteed to hit and penetrate at least once (but since it's a vibro weapon, the latter effect rarely is of consequence).
This is quite a bit of damage, which is a bit of a problem. However, there are solutions to be had, and pretty much all of them revolve around ![]() Saad Amus just not getting the opportunity to attack you.
Saad Amus just not getting the opportunity to attack you.
The first is ![]() Corrosive Gas Generation. With 75 acid resistance, it's not quite as effective as you may be used to. However, you can take advantage of the fact that
Corrosive Gas Generation. With 75 acid resistance, it's not quite as effective as you may be used to. However, you can take advantage of the fact that ![]() Saad Amus comes freeze dried to start and stack up immense densities of gas before he thaws. The Flume-Flier takes him through every single tile between his start and destination tiles, so if you can get him to fly through the gas he can take incredible amounts of damage at once. In general, it's a good idea to stand in a place where he cannot dash into you, as it will seriously hurt, but with
Saad Amus comes freeze dried to start and stack up immense densities of gas before he thaws. The Flume-Flier takes him through every single tile between his start and destination tiles, so if you can get him to fly through the gas he can take incredible amounts of damage at once. In general, it's a good idea to stand in a place where he cannot dash into you, as it will seriously hurt, but with ![]() Corrosive Gas Generation this is even more of a good idea as if you can stack up enough gas and get him to dash through enough times, he will die before getting to hit you.
Corrosive Gas Generation this is even more of a good idea as if you can stack up enough gas and get him to dash through enough times, he will die before getting to hit you.
The second is a source of disarm. ![]() Saad Amus is much weaker without his vibrokhopesh, and is not immune to disarm. While he is immune to damage before fully unfreezing, he is not immune to on-hit / penetrate effects and this includes disarm. You can open up his chamber and shoot him with a
Saad Amus is much weaker without his vibrokhopesh, and is not immune to disarm. While he is immune to damage before fully unfreezing, he is not immune to on-hit / penetrate effects and this includes disarm. You can open up his chamber and shoot him with a ![]() Pistol with
Pistol with ![]() Disarming Shot (
Disarming Shot (![]() chain pistols recommended), or if you have 100 cold resistance you can walk in and use
chain pistols recommended), or if you have 100 cold resistance you can walk in and use ![]() Swipe with
Swipe with ![]() Dueling Stance. From there he's very easy to kill as he can just punch you.
Dueling Stance. From there he's very easy to kill as he can just punch you.
The third is with ![]() Pyrokinesis, as you can apply it on
Pyrokinesis, as you can apply it on ![]() Saad Amus without breaking the cyrochamber walls and unfreeze him. This results in him getting unfrozen then immediately frozen again, in which case you can now attack him and harm him (or just keep spamming
Saad Amus without breaking the cyrochamber walls and unfreeze him. This results in him getting unfrozen then immediately frozen again, in which case you can now attack him and harm him (or just keep spamming ![]() Pyrokinesis) while he remains trapped in the cryochamber. Combine this with
Pyrokinesis) while he remains trapped in the cryochamber. Combine this with ![]() Sunder Mind for a pretty free and easy kill.
Sunder Mind for a pretty free and easy kill.
🗒️ Note: You can gain
Pyrokinesis by cooking with congealed blaze, cured
dawnglider tail, or
fire ant gaster paste. Rank 1
The fourth is with ![]() Phasing and phase-conjugate grenades or with the
Phasing and phase-conjugate grenades or with the ![]() phase-adaptive scope cybernetic. You can use this to essentially do the same thing as
phase-adaptive scope cybernetic. You can use this to essentially do the same thing as ![]() Pyrokinesis, only with thermal grenades. With the
Pyrokinesis, only with thermal grenades. With the ![]() phase-adaptive scope, you can thaw
phase-adaptive scope, you can thaw ![]() Saad Amus and then blast away at him with your missile weapon of choice. With
Saad Amus and then blast away at him with your missile weapon of choice. With ![]() Phasing and phase-conjugate grenades, the termal grenades will at least thaw
Phasing and phase-conjugate grenades, the termal grenades will at least thaw ![]() Saad Amus for the moment, but you'll likely need to break in and start shooting him. This lets out the cryogas, which if you are too slow in killing
Saad Amus for the moment, but you'll likely need to break in and start shooting him. This lets out the cryogas, which if you are too slow in killing ![]() Saad Amus will result in him getting free and attacking you.
Saad Amus will result in him getting free and attacking you.
These are the safe options. Any other option and you run the risk of ![]() Saad Amus actually getting a fighting chance. In this case, you'll want to try and lock him down as best as possible. If he pops
Saad Amus actually getting a fighting chance. In this case, you'll want to try and lock him down as best as possible. If he pops ![]() En Garde!, it's recommended that you get some distance and let the duration expire so he doesn't continuously disarm you. If you have 100 cold resistance, freeze grenades mk III will work a charm, just make sure you reapply as necessary as 75 cold resistance will get
En Garde!, it's recommended that you get some distance and let the duration expire so he doesn't continuously disarm you. If you have 100 cold resistance, freeze grenades mk III will work a charm, just make sure you reapply as necessary as 75 cold resistance will get ![]() Saad Amus free quicker than you might want.
Saad Amus free quicker than you might want.
Plasma is another great option here, as the duration will last quite a while and make ![]() Saad Amus very susceptible to the cold of the bottom chambers of Bethesda Susa. Make sure you don't get any on yourself though.
Saad Amus very susceptible to the cold of the bottom chambers of Bethesda Susa. Make sure you don't get any on yourself though.